Do you want to learn how How to install Google Analytics for WordPress by ExactMetrics?

Well, Google Analytics is important because you can know your audience interaction, and also it’s important for the growth and success of your website.
Google Analytics is one of the best tools to know your audience, where they are coming from, the real-time data, and all their interaction with your website.
So, it is quite important to install the tool on your website.
There are many methods of adding Google Analytics to your WordPress website.
Well, once you know what you are actually doing, then these techniques are quite simple and use any of them.
Disclosure: This article may contain affiliate links. If you buy through links, I will get little commission without costing anything extra to you. Read affiliate disclosure for more details.
Therefore, in this article, we will share a complete guide on how you can easily install Analytics to your website.
Table Of Content
How to install Google Analytics for WordPress by ExactMetrics?
The ExtraMetrics is a WordPress plugin that can help to properly set up all the best Analytics tracking features without even coding or hiring any developer.
The best thing about ExactMetrics is is has over 1 million users just because of the signature Google Analytics Dashboard that help the Google Analytics stats inside the WordPress dashboard itself.
The goal of the plugin is to help people grow their business and get data-driven decisions for their websites.
ExactMetrics go beyond the simple analytics script to an advanced event tracking, so that you can see all the important users and behaviors through WordPress in just a few clicks.
So, these are some of the few steps that you can follow to install the ExtraMetrices plugin:
Step 1: Visit Google Analytics site
If you don’t have an account, then to start with Google Analytics, visit Google Analytics and click on the Start for Free or Sign in to the Analytics which is located right at the top corner.
Here you can enter your existing Gmail address or your phone number to log in. Or else you can Create an Account if you don’t have an account.
Note: I suggest you to use the same Gmail address which you have used for your Google search console account.
Step 2: Signup For Google Analytics Account
Once you are logging in to your Google Analytics account, then the next step is to Sign Up the Google Analytics.
So click on the Sign Up to get started with your new Analytics account.
Enter your Account Name for your Analytics dashboard. Make you check all the lists under the Account Data Sharing Settings, then click on the Next Button.
Create a Google Account by providing all your details about your website like entering the name of your WordPress website, its URL, and which industry you belong to. Also, report the time zone.
Once you have entered all your information, then a pop window will appear that contains the Google Analytics terms and services agreement.
You can review the terms and services and check the box and scroll down to click I Accept.
Now your Google Analytics is running and, on the next screen, you’ll see the tracking code and the tracking ID.
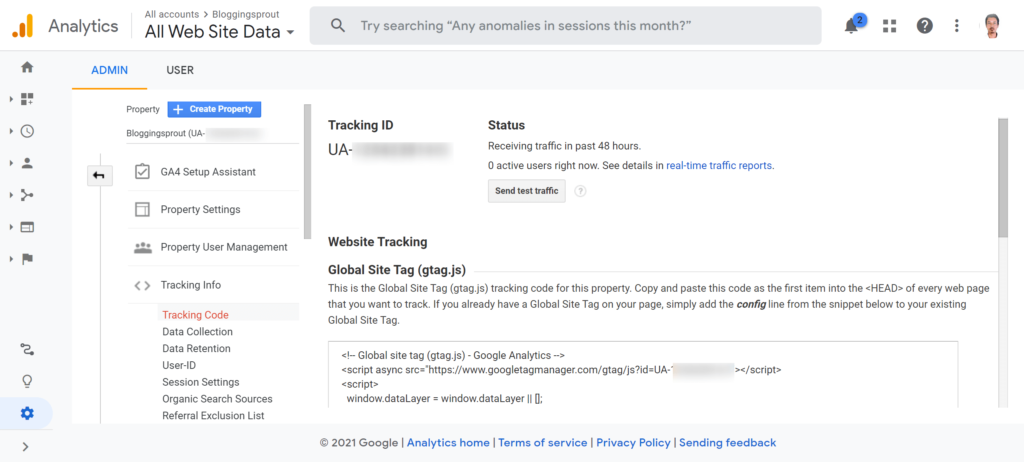
Keep the page as it is open, as you might require any data in future.
Step 3: Install ExactMetrics Plugin
ExactMetrics is one of the best Google Analytics plugins for WordPress as it has a lot of features and the best part is you don’t have to touch a single piece of code.
The configuration of the Analytics is quite simple.
To install the plugin, go to the WordPress dashboard> Plugins> Add New. Then search ExactMetrics in the search bar like this.
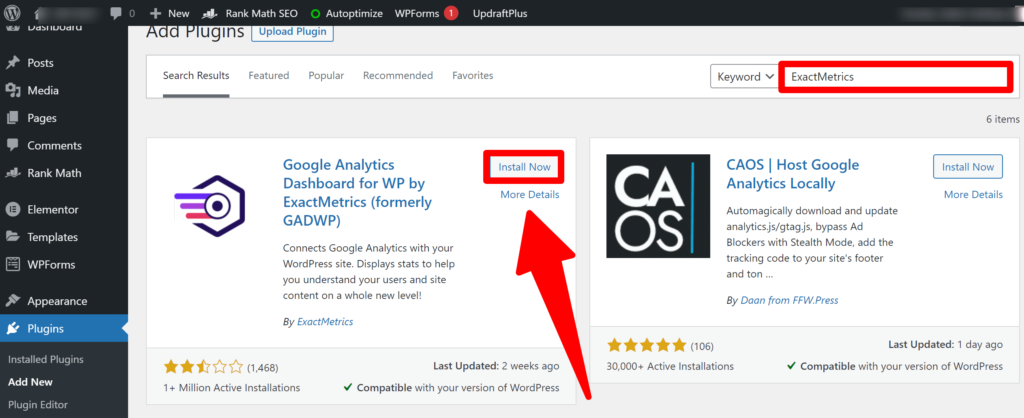
After that click on Install Now and then activate it. Now ExactMetrics is installed on your site successfully.
Step 5: Connect Google Analytics Using the ExactMetrics
ExactMetrics is successfully installed on the website, and you can connect with Google Analytics with your WordPress website.
Now to start, you can go to the ExactMetrics and click on the settings from the dashboard and click the Launch setup wizard.
Next, select the website type by choosing from the 3 options, whether it’s a business website, blog, or an eCommerce website.
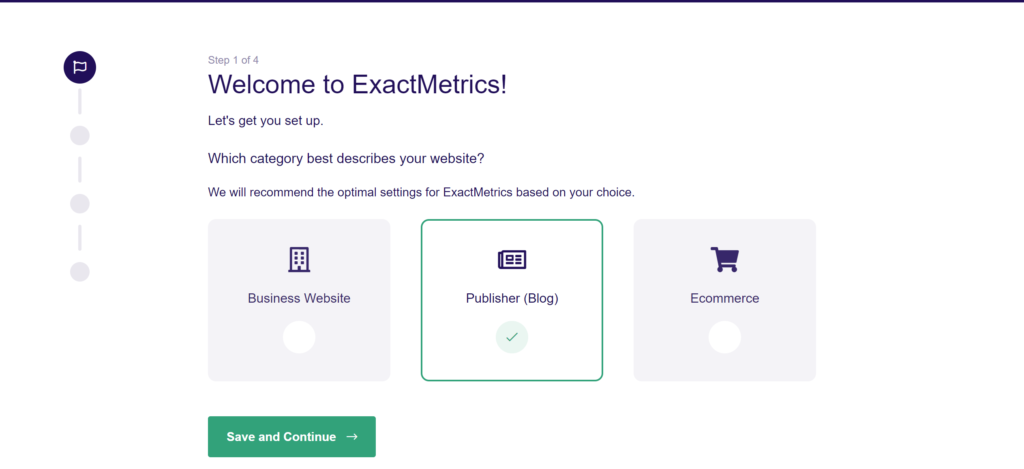
Once you have selected the options click on the save setting and continue.
The wizard will now connect to your google account and select from the container in the Analytics profile.
Once you select your Google account, give permission to the ExactMetrics. It’s important to allow permission or else the plugin won’t function properly.
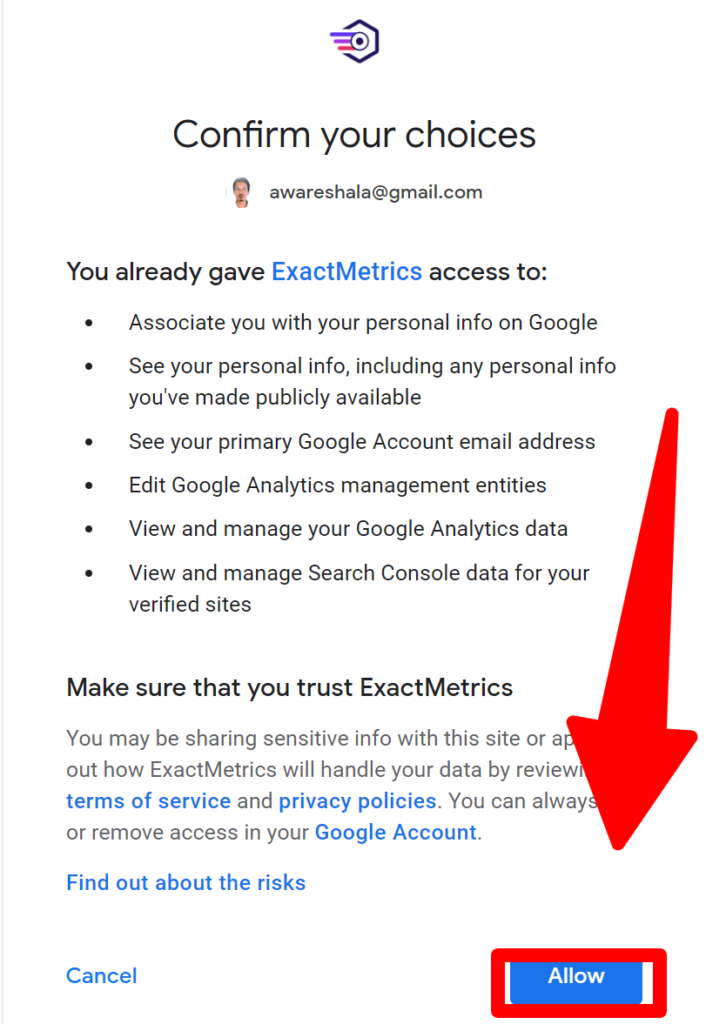
Now select a profile to finish the connection with Google Analytics. Make sure if you have multiple websites, you must select the required website on which you are installing it.
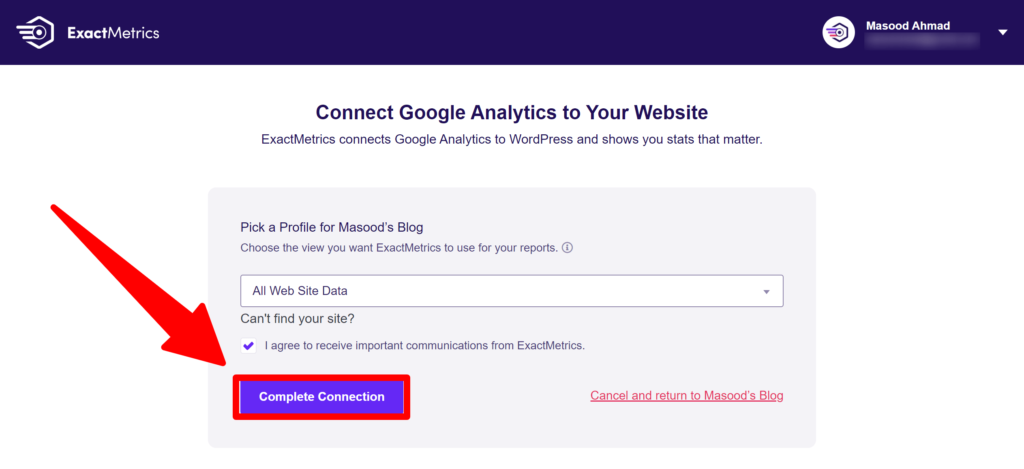
Click on complete connection, and you are done.
Step 6: Add Recommended Settings
If you install the ExactMetrics, you will probably get the default settings.
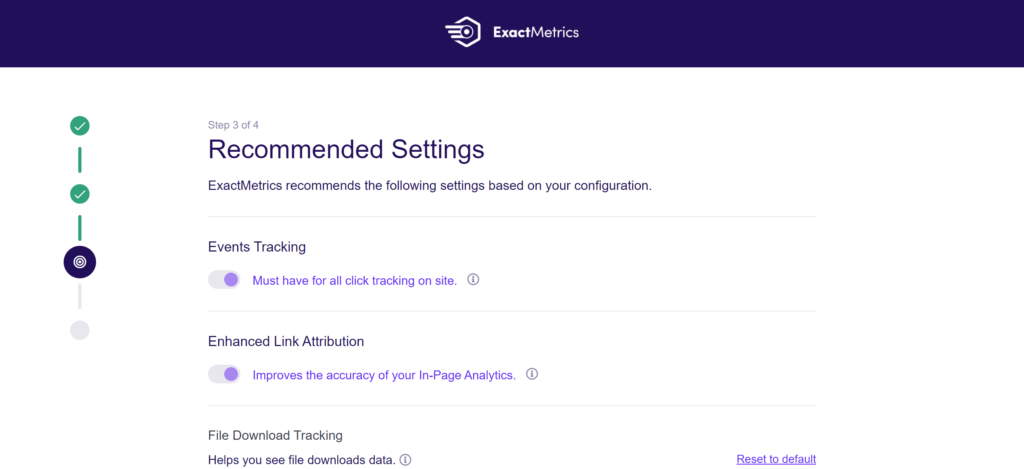
Make sure you enable the event tracking and enhance the link attribute so that the plugin can automatically track your files.
The best thing is you can add more extensions for tracking.
Well, if you scroll down you’ll see tons of setting that will include affiliate tracking, also you can select the role of the view and many more other settings.
You can add different addons which can gather all the instances about the user behavior on your website. In addition, you can enable the AMP addons as well.
If you want more funcationalties and features to your analytics like:
- Email Link Tracking
- File Download Tracking
- Affiliate Link Tracking
- eCommerce Tracking
- User Behavior Report
- WooCommerce Integration
Then you can upgrade to ExactMetrics Pro which starts from $99.50 per year for a single website.
You can get Most popular plan at just $199.5 per year for 5 sites with 50% OFF Now.
Step 7: View ExactMetrics Reports
You have completed all the settings and successfully added Google Analytics.
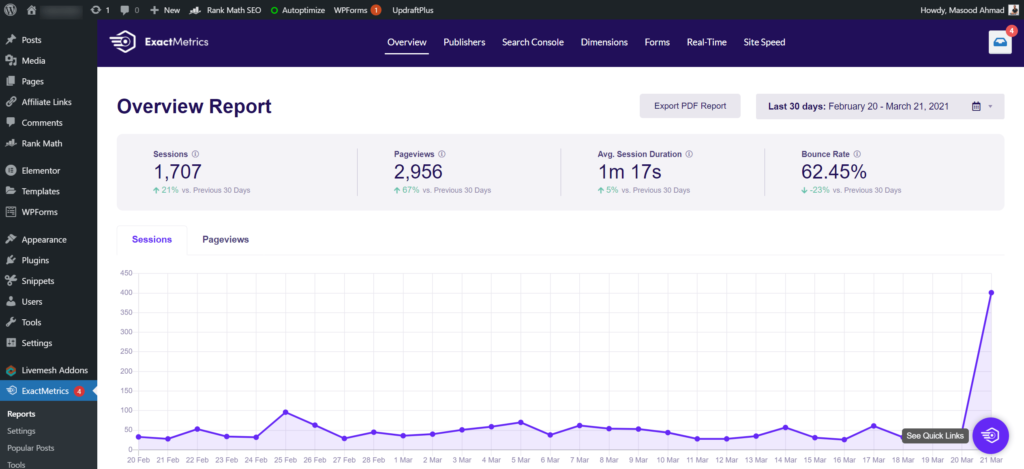
Now you can simply go to your WordPress dashboard and check the number of sessions, bounce rate, and also user interaction with your website.
ExactMetrics Free Vs Pro
You must be wondering if I am getting all google analytics reports in my WordPress dashboard. Then what’s the use of taking the pro version of it.
Am i right?
So let me give you details in brief, what you are getting in the free version and what other important features you are missing.
In FREE version, you are gettng onlu the basic features like:
- Weekly, Monthly reports of visitors
- Top 10 countries from where they are coming
- Top 10 referrals sites
- Your Top performing pages
Thats it. You are geeting these features only in free version.
But you can double your traffic and sales when you know exactly how people find and use your website.
ExactMetrics Pro shows you the stats that matter!
- Universal Tracking
- eCommerce Tracking
- Outbound Link Tracking
- Affiliate Link Tracking
- File Download Tracking
- Scroll Tracking
- Forms Tracking
- Google AMP Tracking
- Post Type Tracking
- Focus Keyword Tracking
- Telephone & Email Link Tracking
- Popular Posts Tracking
- etc
There are plenty of features ExactMetrics is offering to its premium users. You can go through all features by visiting the ExactMerics website.
Final Words
We, hope you would have liked the guide on how to install Google Analytics for WordPress by ExactMetrics and successfully added the ExactMetrics plugin to your website.
Now you have options to go with free plan or the preium plan.
I would suggest you to if you are a business owner and above mentioned extra features can somehow help you in increasing your businesses.
Then you must go throug the Exactmerics Pro verion.


![7 Best Discount Wheel Popup Plugins for WordPress [2021]](https://bloggingsprout.com/wp-content/uploads/2021/05/Discount-Wheel-Popup-Plugins-600x300.png)