Are you wondering how WPForms and Zapier can make your life easier? Then you are in the right place.
Here I will discuss the simple way to automate your workflow with the help of WPForms and Zapier.
If you are an affiliate marketer or blogger, then you know the importance of time and how necessary it is to save time by automating the work through tools.
Out of such tools, we have tools like WPForms and Zapier too that can save lots of time by automating our work.
Table Of Content
How To Automate Your Work With WPForms and Zapier
WPForms (Introduction)
Before moving ahead in this article, let’s discuss briefly about the tools one by one so that you can get a rough idea.
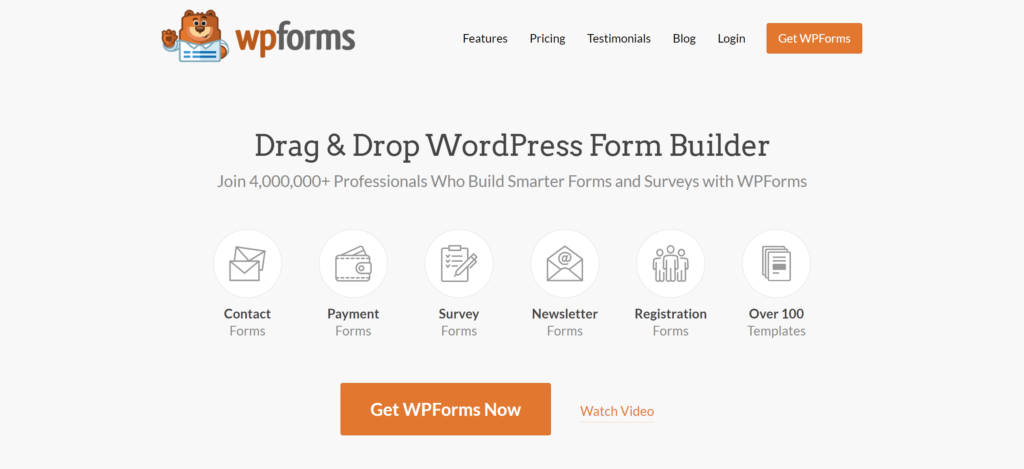
WPForms is incredibly simple wordpress form builder tool or you can say plugin that can build your forms with just drag and drops within minutes.
This form builder is used by more than 4 million users and one of the highly used and recommended tool by experts and bloggers.
With the help of WPForms, you can easily create contact forms, payment forms, survey forms, Newsletter forms and registration forms.
With more than 100 templates pre-designed you will get inside WPForms that you can use directly or edit as per your needs. That’s the reason, it’s one of the best tools.
Some Stunning Features of WPForms:
- Drag & Drop Form Builder
- Responsive Mobile Friendly
- Smart captcha and spam protection
- Easily create surveys forms
- Easily create multipage forms.
- Allow users to upload files and media
- Instant Notifications Features
- High-performance forms with smart conditional logic
- Lots of pre-built form templates
- Split long forms into multiple pages
- Create custom WordPress user registration forms
- Paypal and Stripe addon
- Email listing growing integration (Weber, Mailcbhipm, GetResponse, Sendinblue etc)
- + More
Plans and Pricing of WPForms
The paid version of WPForms comes with 4 different plans. Lets discuss each one by one.
Though WPForms offer a free version as well but that will be available with limited features only. But if you want to have more functionality with your forms, then I suggest you to go with their premium plan.
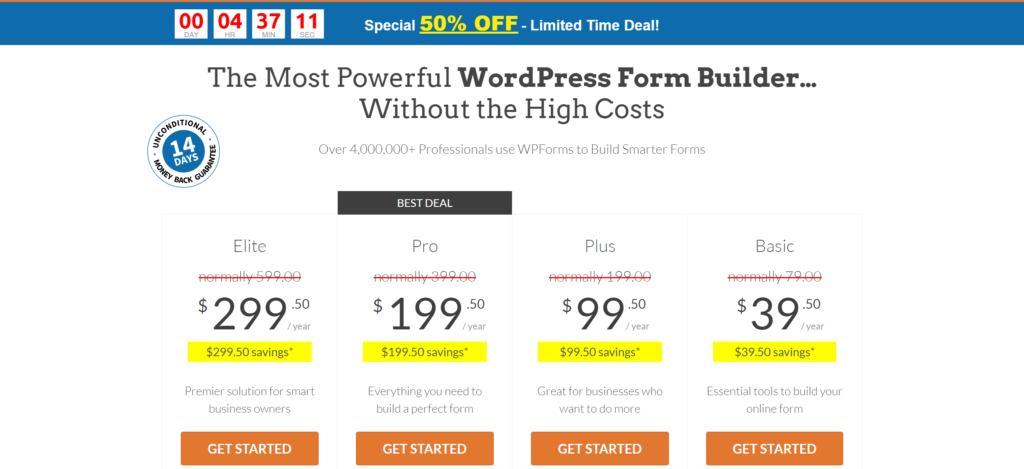
Currently it has Basic, Plus, Pro and Elite plan only.
1. Basic Plan (One Website)
The basic plan will cost you $39.50/ year. You will get only one licse to use, so you can use it in your single site only.
2. Plus Plan (Three Websites)
The plus plan wil cost you $99.50/ year and you can use this to maximum three websites.
3. Pro Plan (Five sites)
This will cost you $199.50/ year and you can use it for 5 sites. This plan is the recommended and best selling plan, as you will get more features as compared to basic and plus plan like:
- PayPal and Stripe addon
- Zapier integration
- Form landing page
- Survey and polls
- Geolocation
- User registration
- Etc.
4. Elite Plan (Unlimited Sites)
This plan will cost you $299.50/ year and it’s best for the agency owners as its license can be used on unlimited sites.
I recommend you to buy their “Pro” plan to get maximum features. If you are not satisfied they are providing a 100% No-Risk Money Back Guarantee. You can claim within 14 days from the date of purchase.
Related Read: 7 Best Contact Forms To Use With Mailchimp
Zapier (Introduction)
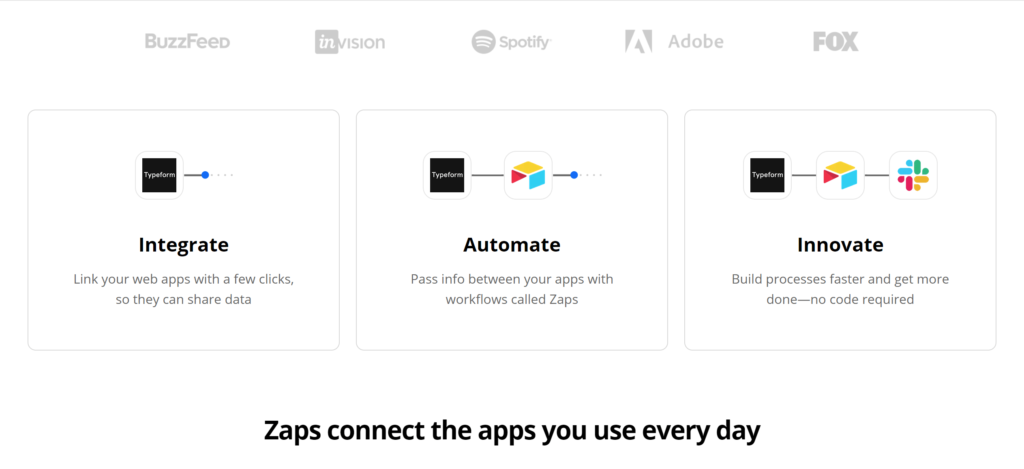
Zapier is the tool that is making work easier for the people like digital marketers and entrepreneurs by automating the workflows.
There are more than 3000 apps that you can set up and automate the work. Just connect your favourite apps like Gmail, Mailchimp, Google Calendar, Slack etc and just see work getting done on automation.
Let me explain briefly the work of Zapier. Let’s suppose you organise an event and for collecting leads through social media you ran a campaign.
When someone registers for your event, the registered user get a follow up in a week with the next steps and at last send them a welcome email.
Features Of Zapier:
- 3000+ Apps to use
- Zapier has 99.9% uptime
- Pre-made zaps and templates
- Customize your App easily
- Pre-ready templates and zaps
Plans and Pricing of Zapier
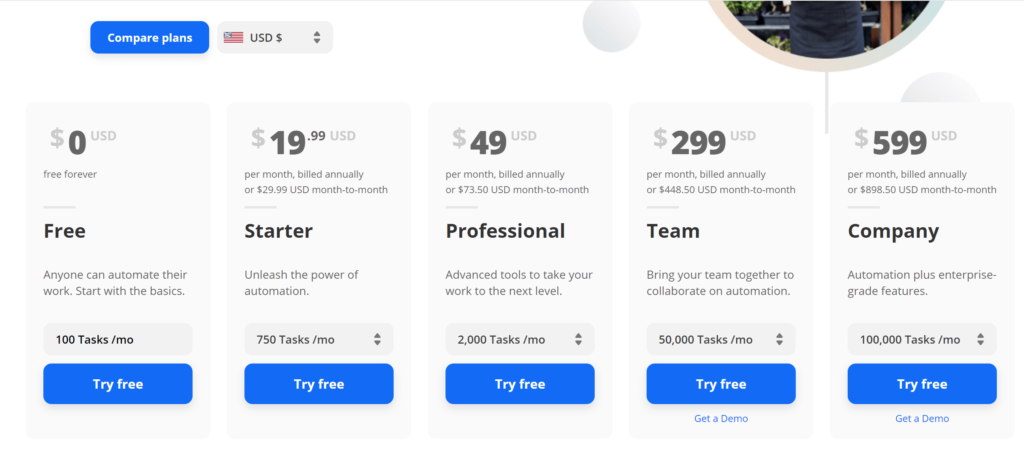
Basically, Zapier comes with 5 different plans. Among the five plans, one is free and another four are paid ones.
1. Free Plan
In the free plan, you will get 100 tasks per month with 5 zaps and 15 minutes update time. This will cost you $0 forever.
2. Starter Plan
This plan will cost you $19.99 per month if you pay annually and you will get 750 tasks/mo. You will get 20 zaps and 15 minute update time.
If you want then you can upgarde to 1500 tasks/mo for $39 per month.
3. Professional Plan
In this, you will get 2000 tasks per month with unlimited zaps, 2-minute update time and more premium apps to connect. It will cost $49/mo.
4. Team Plan
If you are looking for team work to get done, this plan is for you. This plan comes at $299 per month for 50,000 tasks per month. Many more features are included too.
5. Company Plan
This plan comes with the huge cost of $599 per month where you can do 100,000 tasks per month. You will get unlimited zaps with a 1-minute update and many more features.
You can visit Zapier to know more about its features.
How to make life easier with WPForms and Zapier
To reduce your workload and time, you can easily integrate WPForms with Zapier. Just follow the below steps.
Integration of Zapier comes with the Pro version of WPForms only, so you need to buy it. Click on this 50% discount link to purchase.
Step1. Install the WPForms on your blog
For installing you can visit the WordPress dashboard and then click on the Plugin section from the left bar. After that, you have two options, either you can upload or Add New from the WordPress directory.
Here let me show to add from the WordPress directory, how you can do that.
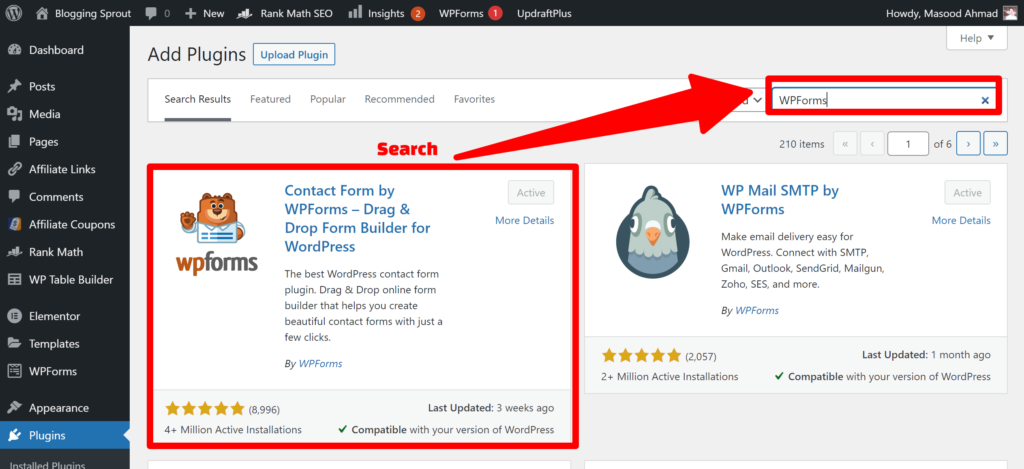
Just search it and then click on the install button. After that, hit the activate button. You need to put your license key that you purchase to complete the setup completely and for integration.
Step 2: Integrate Zapier
For the Zapier addon, you need a pro plan of WPForms. Now, for activating the Zapier addon, go to WPForms » Settings and then click on Integrations.
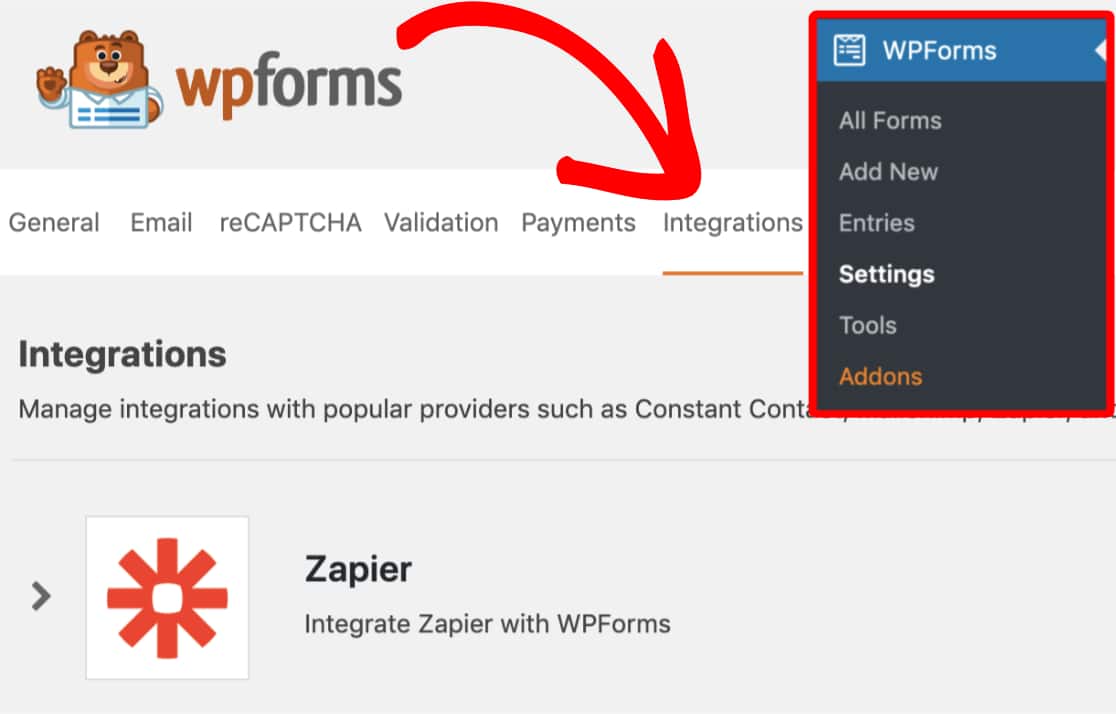
Within this tab, you’ll see a Zapier option. Go ahead and click it to open more details. This is where you’ll find the Zapier API key for your site.
Step 3: Create a Zap in Zapier
In the Zapier tool, the integration you create is basically called “zaps”. So you need to connect the app you like with Zapier to start the automation.
Before you start creating the zaps, you need aan account there. So make sure you have signed up from the available plans of Zapier.
After you’ve logged into your account, you’ll need to click the black + button in the upper left corner.
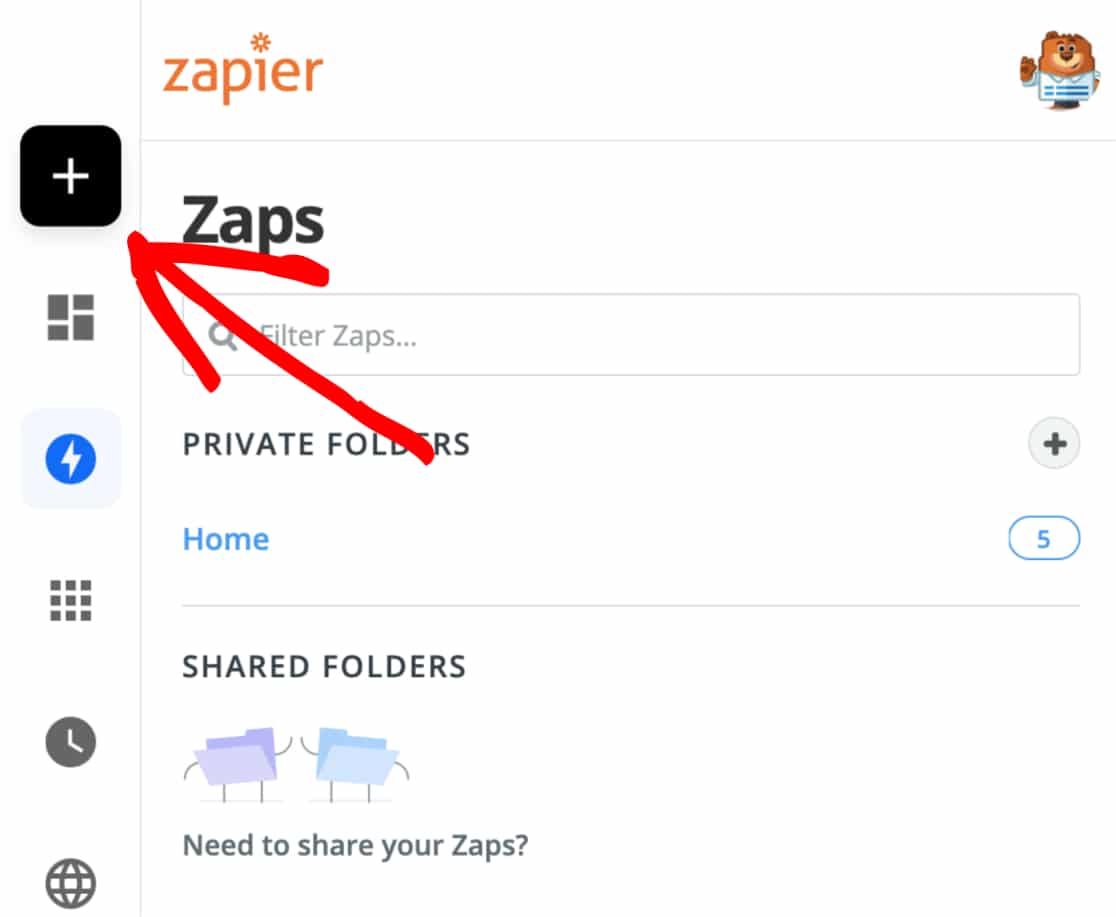
It’s very easy to create a zap. If you need more details, then you can follow this blog from WPForms.
Bottom Line
Hope you have found this article about WPForms with Zapier helpful. And you got an idea, on how to automate the work with the help of Zapier.
WPForms is a great WordPress based form builder and Zapier is an automation tool. Integrating these both tools will definitely help in your reducing your time and effort and help in growing your business.
For any queries or suggestion, just comment it below.
