Are you interested in learning a way to keep records and track all of the emails that are sent out from your WordPress site? If yes, this blog is especially for you.
Actually, Email logs help us to monitor the emails sent by the WordPress site to the users.

In this post, you are going to learn about how to Set Up WordPress Email Logs in order that you will be ready to view the email logs directly from your WordPress admin area in an easy format.
The quick and simple steps for setting WordPress email logs are:
- Install WP Mail SMTP plugin
- Enable WordPress email logs
- View WordPress email logs
Table Of Content
Why You Should Turn Email Logs On?
Once you enable email logging, your WordPress database will keep track of all the emails sent from your site.
In this way, you can see all the information about a specific email, such as:
- The status of the email: Which helps to make sure either the email was successfully sent or not.
- The date and timing of all emails sent
- Which visitors or team members received which email access
- You can track the type of email sent to the audience
How to set up WordPress email logs in 2021?
So, want to know how to find out the emails sent by your WordPress site?
The free plugins come out with an option to configure popular email service providers like Sendinblue, SendGrid and Gmail as your WordPress SMTP but they come with limited functionalities as you won’t be able to see your email logs.
Trending Now: Best WordPress Survey Plugins in 2021 (Polls+Survey)
You can upgrade to the WP Mail SMTP pro version to see the email logs directly from your WordPress panel with lots of other features.
Note: WP Mail SMTP comes with 14 days free trial. You can test and use all their features under the trial period and if you don’t like you can claim a money-back guarantee under 14 days.
Follow these simple three steps below to set up email logging in WordPress:
Step 1. Install the WP Mail SMTP Plugin
The first thing you need to do is to install and activate the WP Mail SMTP plugin on your WordPress site.
You can either download the plugin file or install this plugin from the WordPress directory.
Let me show you how?
Go to Plugins » Add New » Search “WP SMTP” and install it from there. You can get the idea by looking at the image below.

You can let the WP Mail SMTP team set up everything for you. In this case, be sure to check the White Glove customization option, which is adjusted and tested by the team for your email.
After enabling the WP Mail SMTP plugin, go to your WordPress dashboard.
Step 2. Enable WordPress Email Logs
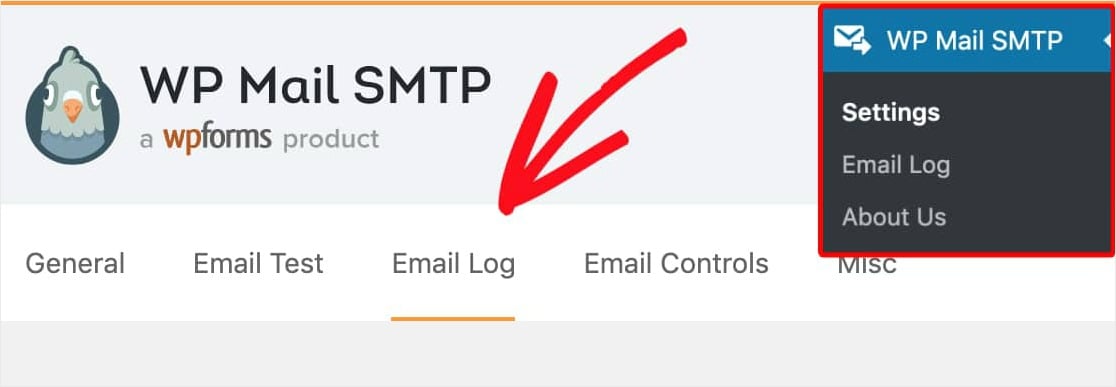
In your WordPress dashboard, go to WP Mail SMTP » Settings. Then click the Email log tab.

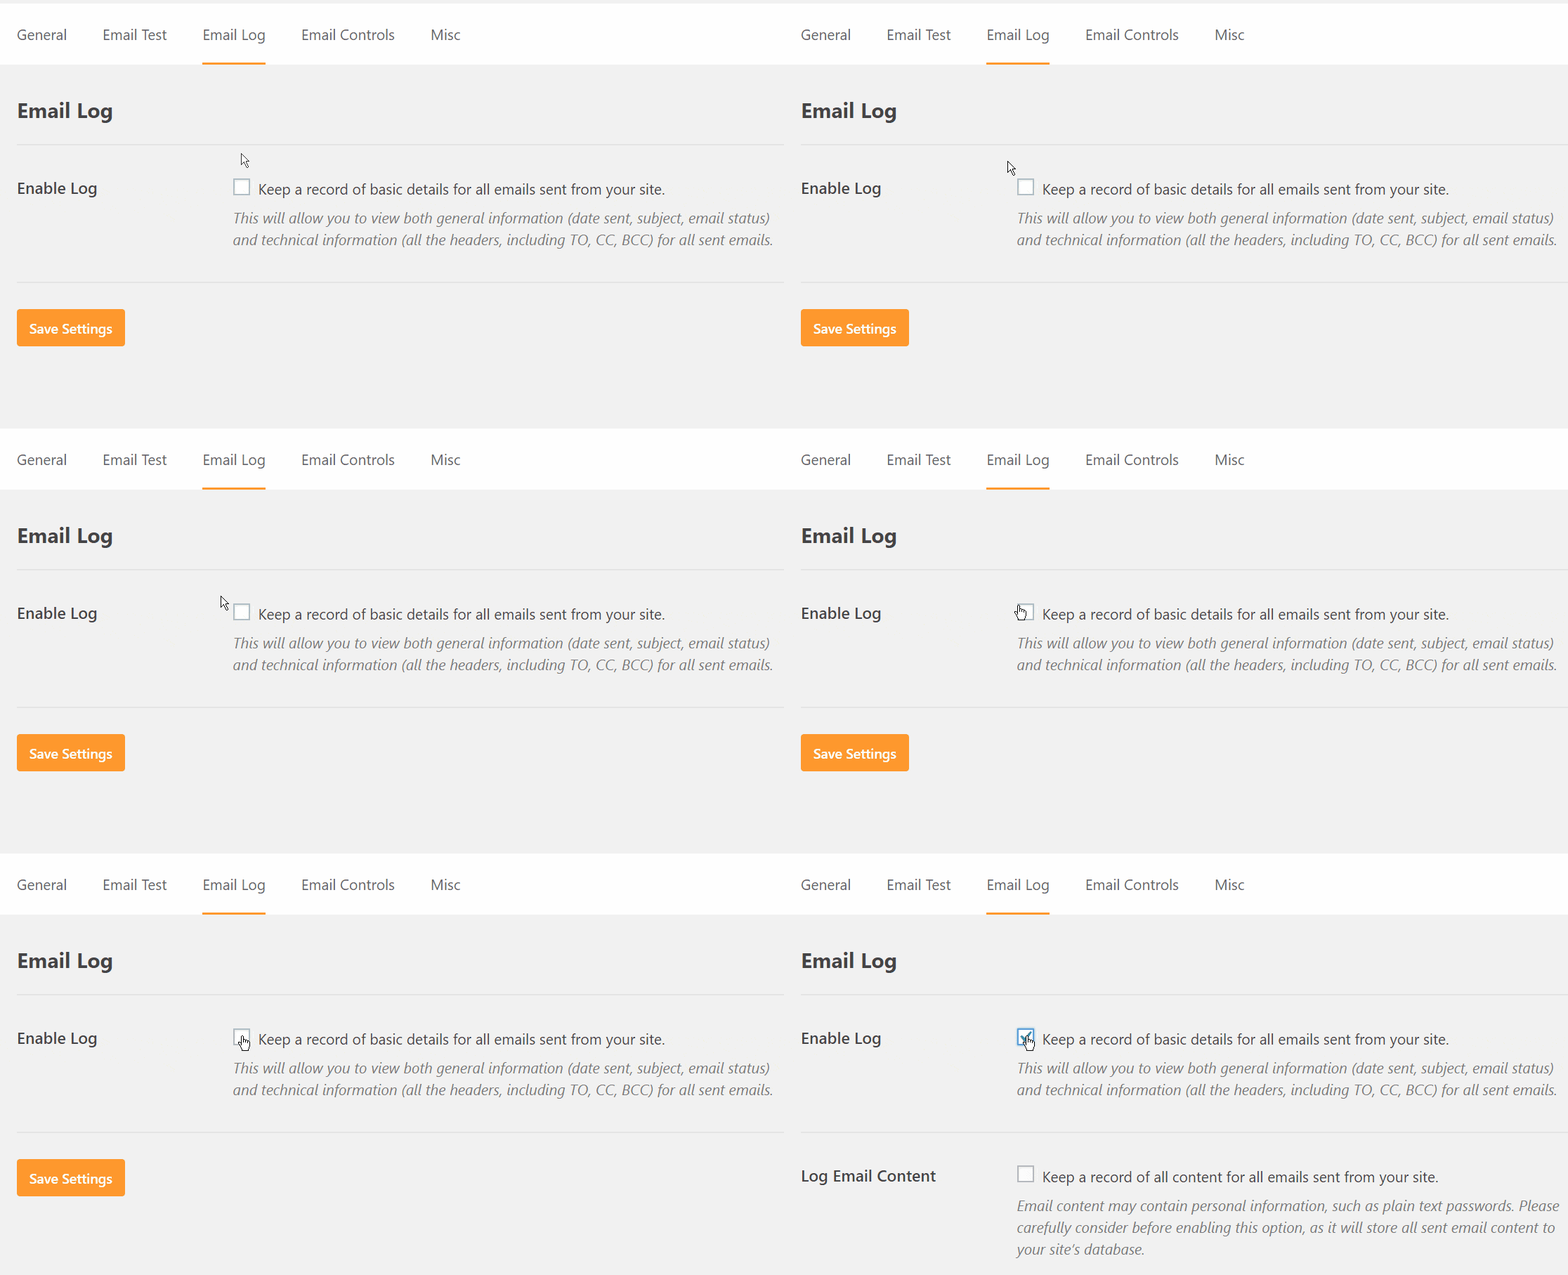
On the email log page, you will see the “Enable log” option. This will log every email sent from your website.
Use this option to enable logging. The details of each WordPress email log include the following:
- Mail Status which will let you know if it has been sent successfully.
- Date and Time Sent
- Subject Line
- Recipient Email Address
- The email address of the sender.
- Number of Attachments
- Mailer Options Used
- Additional technical information such as content-type, MIME, etc.
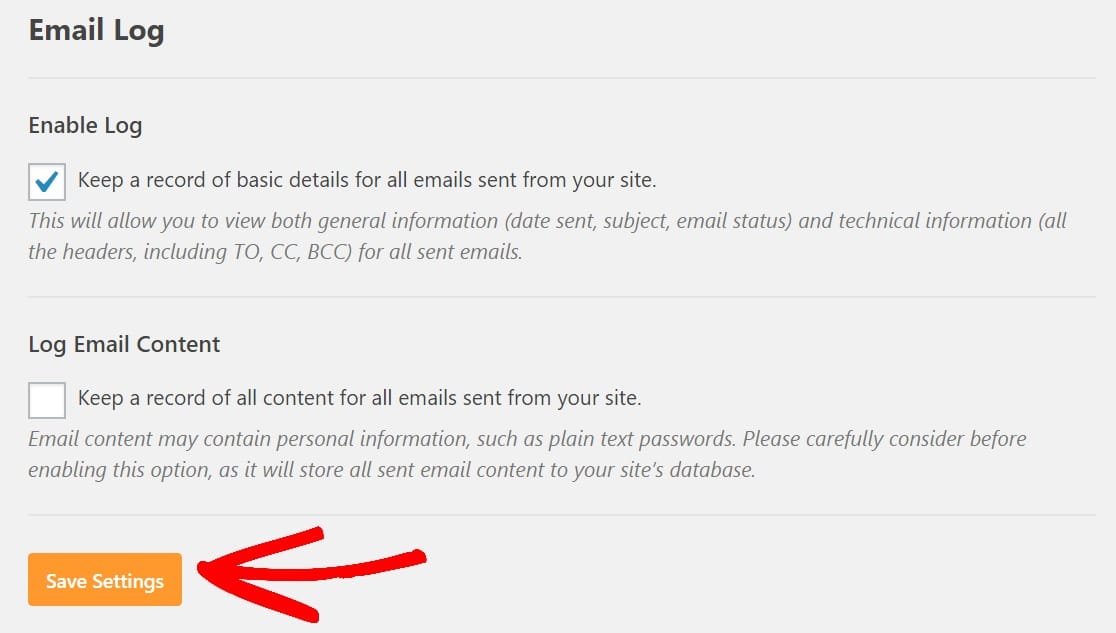
After that move ahead and click on the box next to Enable Log. After selecting this option, you will see a second option called “Log Email Content” under this option.

The Log Email Content option saves all of the content of emails sent from your site. You can find it in the email log along with the other details.
It is entirely up to you whether you want to enable Log Email Content. This is an optional setting and is not required to enable email logs.
Think carefully about whether you really need to enable the Log Email Content option. Each of the email content will be stored as plain text in any site’s database.

Next, click on the Save Settings button to allow WordPress email logging.
More To Read: 7 Best Discount Wheel Popup Plugins for WordPress [2021]
Step 3. View WordPress Email Logs
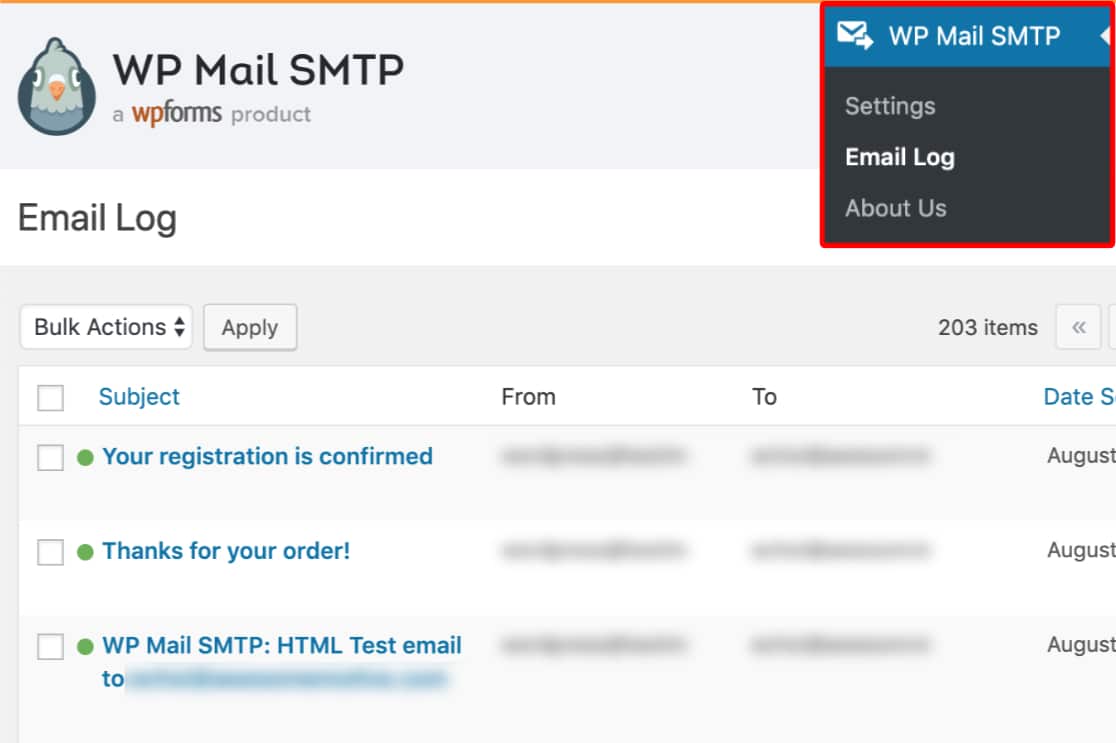
To view and analyze the email logs of your WordPress site, simply click on the “WP Mail SMTP” navigator in the WordPress dashboard, and then click on the “Email Log” on the left side of the WordPress admin panel.

The most recent emails are displayed at the top of the list. The best thing is, You can view WordPress email logs at any time without leaving the admin panel of WordPress.
Bingo! In this way, You’ve formally enabled and viewed your WordPress email logs.
Final Words
Hope this article has guided you to learn how to set up WordPress email logs and WooCommerce email logs.
So what are you waiting for? Manage your email logs by solving every type of WordPress email related issue at once by using WP Mail SMTP.
Thanks for reading this article.


